Moving on in the MailChimp series, let's get you another step closer to sending out professional email marketing messages by creating your list If you haven't already please read the first 2 parts in my MailChimp series:
Email Marketing vs. Permission Marketing
Why Use an Email Marketing Platform?
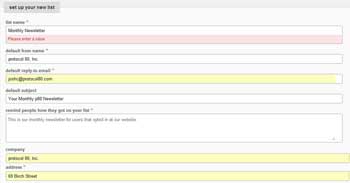
The email reminder is fairly important as sometimes recipients forget why or when they signed up to receive emails from you. To avoid immediate unsubscribes be somewhat descriptive, but you don't have to write an entire essay on why the subscriber signed up.
Finally, make sure that your business name and address are accurate. These will go in the footer of your email. You can have separate addresses for lists if need be. For example if your customer relations department is in Moosejaw but your public relations department is in Phoenix, it might make sense to have their specific address in the footer. Once you finalize your list details, you can confirm and move on to the next step.
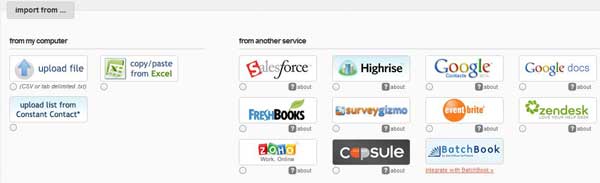
One nice feature MailChimp has provided is an easy way to import your current lists into your new MailChimp account. The option I use most often is copy/paste from excel and uploading a csv file. You are able to upload lists from Constant Contact, Salesforce, Highrise, Google Contacts and many more, but you often find yourself cleaning your list prior to uploading which is generally easiest from Excel.
Remember one of the reasons you are using MailChimp is to comply with the CAN-SPAM Act, so please ensure that your lists are acceptable to be used in MailChimp. These lists must be people that have given you permission to email them either through your website, offline, or internal employees. MailChimp does a great job explaining in simple terms what is and what isn't allowed.
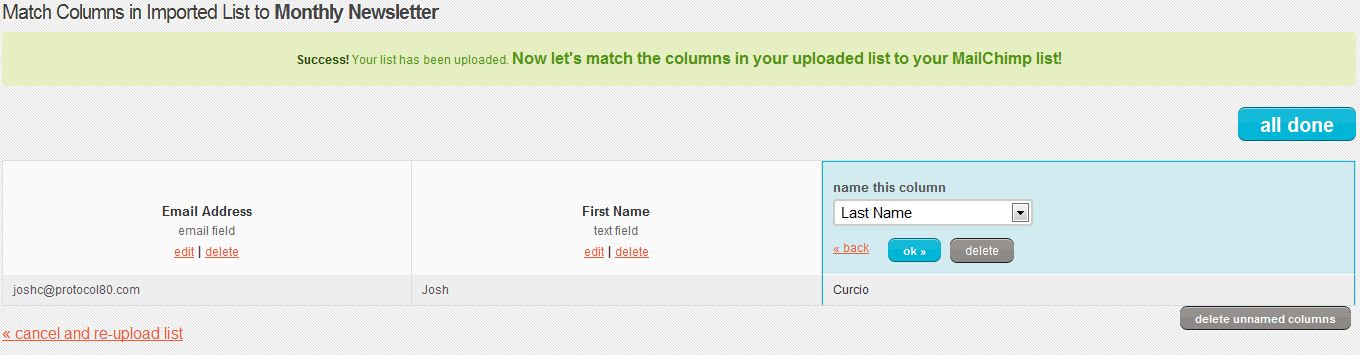
When you import your list remember that you may want to use Merge Tags (we will talk about later) to personalize your emails to your subscribers. Make sure that you assign the appropriate name to the column...MailChimp will not allow you to move forward without mapping each column or deleting unnamed columns first. Now you are free to click "All Done".
You have imported your first list. You can easily add or remove people from this list as well as view list analytics. I am sure you will have a few more lists to add and before you know it you will be a pro at importing and editing your lists. The next topic we will talk about is creating a custom template to match your company's branding.