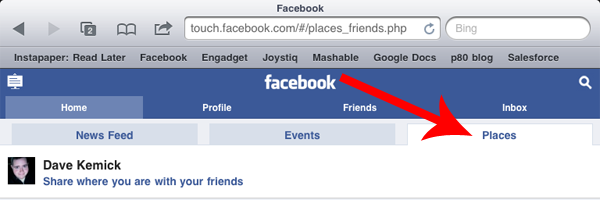
There are a few different ways you can interact with Facebook Places. The simplest is to fire up your mobile web browser and visit touch.facebook.com and then head on over to the "Places" tab.
You can also access Places from the Facebook application available on most popular smart phones, such as Android and iOS-powered devices.
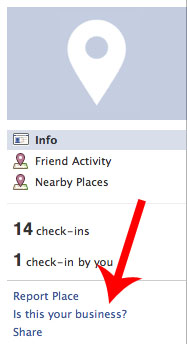
Now that your place has been created, you can use the same steps mentioned above to claim it. Note that in order to verify your claim on your business Facebook will ask you to step through a phone verification process. Alternatively you can have verification papers mailed to you, but in most cases the phone verification process is much more quick and painless!
As I mentioned at the beginning of this post, hopefully you've already setup a page for your business. Now that you've created a Facebook Place for it as well, why not link them up instead of having two separate entities to confuse your customers? You can do this by visiting your business's Facebook Place and clicking the "Merge With Existing Page" link in the left navigation. This will bring up a box of all of your available pages, click the one you want to merge the place with and map plus check-in data will be imported into your Facebook page automatically! Essentially, merging your page and place give people one central location on Facebook to visit in order to interact with your business, and with the Places information built-in they get a richer experience. Pretty cool, huh?
One thing to note when you're considering merging your Page and Place is that you do lose certain page functionality when you do so, and the merge is irreversible. The biggest feature loss is the ability to set a landing tab on your page, which is huge if you've invested time in setting up custom tabs on Facebook. Be sure to weigh the costs of merging before you commit!
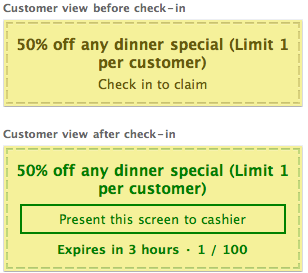
Now that you've claimed and merged (or not) your Facebook Place, what's next? Well, essentially Facebook Places allows you to create offers much like Foursquare. You can setup specials for customers visiting your brick and mortar location that have checked-in on Facebook Places with a new feature called Facebook Deals.
To create a deal, visit your Facebook Place listing and click "Create a Deal" at the bottom of the page (it looks like the image above). From here all you have to do is determine the specifics of your deal. Much like with Foursquare, try to tailor your deals to your style of location and your customers' preferences. If you're already active on Foursquare and know what works based on your analytics data, feel free to setup similar deals here on Facebook Places! There are four separate types of deals, categorized in the image below:
Finally, review your deal in the deal preview and send it out to your adoring fans! They'll see the deal listed when they go to check in at your location, and they can then redeem it. Much like with Foursquare, Facebook has set up deals focused towards customer acquisition as well as customer retention, so be sure to try all of the different kinds of deals to ensure you attract customers!
That's it! You're now a Facebook Places pro. It's important to cast a wide net when approaching location-based services, so be sure you have your Google Maps and Foursquare locations reserved as well. I've written handy guides for setting those up as well, so look below to get started if you haven't already!
Note: If your business isn't found or if you run into other issues, please refer to the post above, or leave a comment and we'll try to help you out!