
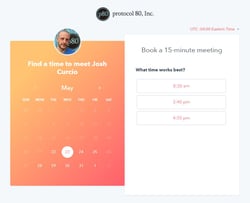
… And guess what – you can use it for FREE!
From start to finish, you should be able to set up your meeting tool in 15 minutes or less!
Setting Up HubSpot Meetings with Google Calendar
- In HubSpot, find the "Meetings Scheduler" link under the main navigation item "Sales"
- Click "Connect your Google calendar"
- Read and accept the terms of use
- You'll be taken to your Google login screen – choose the appropriate account, and click the "Allow" button
- Proceed to general settings
Setting Up HubSpot Meetings with Office 365 Calendar
- In HubSpot, find the "Meetings Scheduler" link under the main navigation item "Sales"
- Click "Connect your Office 365 Calendar"
- Read and accept the terms of use
- You'll be taken to your Office 365 screen, choose the appropriate account, and finish logging into your 365 account
- Proceed to general settings
HubSpot Meetings General Settings
1. Set your default availability (Keep in mind that events/appointments scheduled on your Google Calendar or Office 365 Calendar will supersede your default availability on your HubSpot meetings tool)2. Set your required form fields – you're limited if you are using the Sales Free tier
3. Book a test meeting so you can see functionality and make sure it works
Technically, it's ready to use, but the following are recommended items to make it function better for you:
1. On the Meetings screen, click to edit your meeting details (title and meeting name) and update to something relevant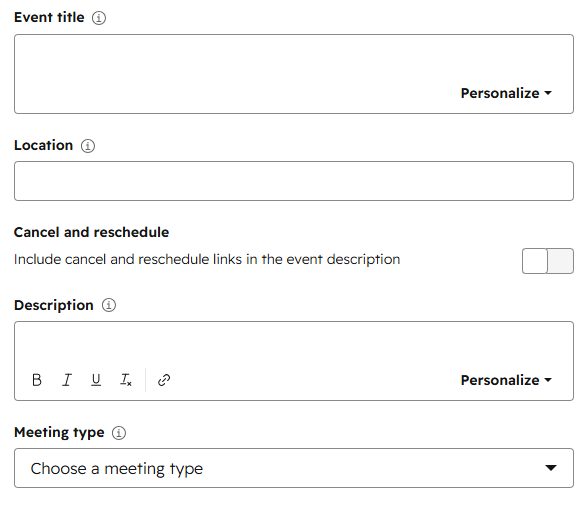
2. Add a photo of yourself (or your company logo) so the person can put a face to the name
3. Change your default duration options. By default you will see 15 mins, 30 mins, 1 hour. You can keep 3 options and adjust accordingly, or reduce the options.
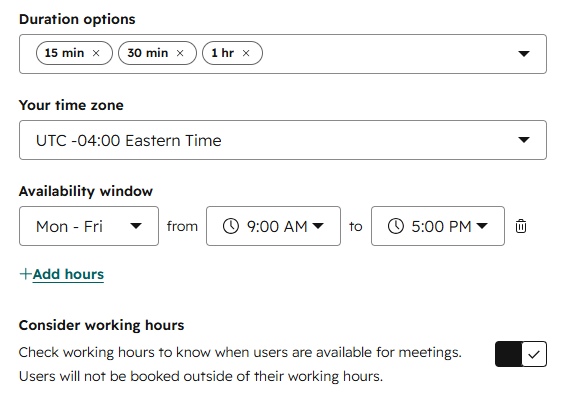
4. Add a default location for where the meeting will take place
Examples: Conference call, in-person, Contact name to call Your Name
6. Enter an invite description. This is where you will want to include any relevant information for the meeting, such as conference call details, phone number, etc.
Tips: You can add multiple reminders and choose from a set number of minutes, hours, days, and weeks. You can also set your email reminders based on your preferences.
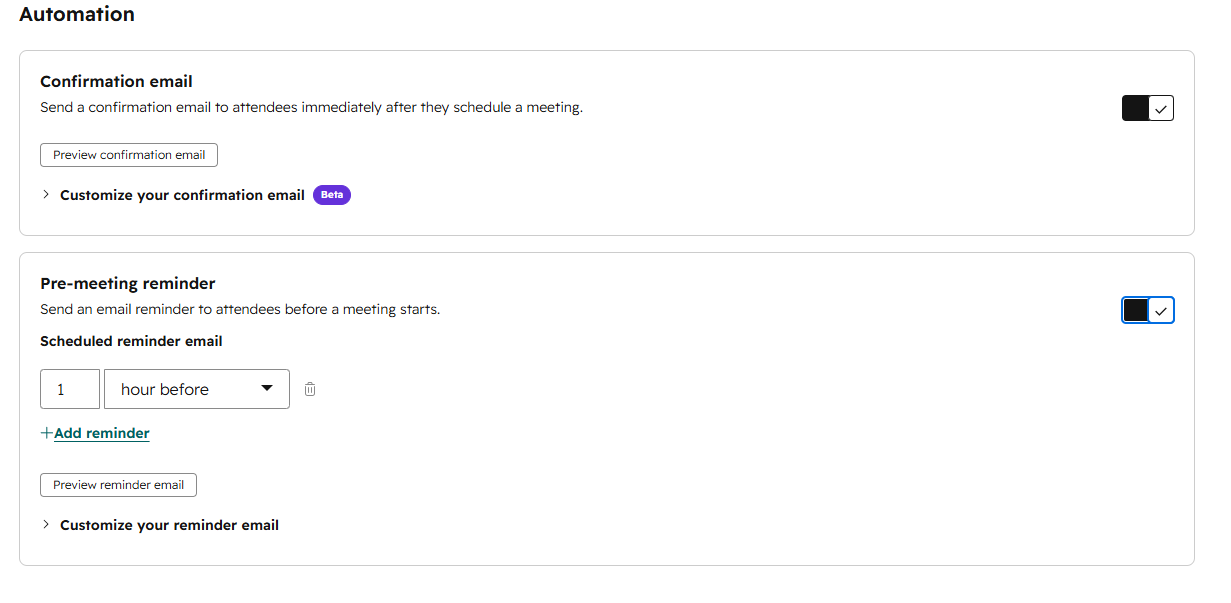
Tip: If you set your buffer time to 15 minutes and you have something in your calendar from noon to 1 pm, people will not be able to book a meeting that runs past 11:45 am or before 1:15 pm
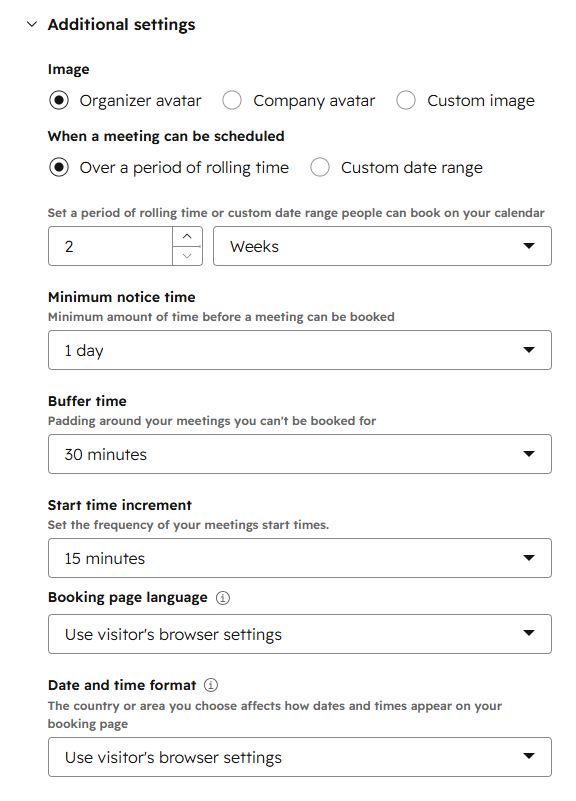
Bonus Tips for HubSpot Meetings Tool
Once you have your meeting scheduler set, there are a few additional changes you can make:
1. Add your meeting link to your email signature so it's easily accessible3. Encourage leadership and management to create meeting links
This way, you can help improve the overall scheduling experience of your and your team’s workflows. These quick wins can make a major difference in moving leads along the sales pipeline!
Benefits of Upgrading Your HubSpot Tier for Meetings
Upgrading your HubSpot tier is a simple way to streamline the above process (along with many other benefits). By upgrading to HubSpot Sales Starter or HubSpot Sales Pro, you’ll be able to perform the following:
- Add the ability to create multiple meeting links
-
- For example, create a meeting link for current clients that gives different options than those for prospects
-
- Access team meeting links (for everyone using Sales Starter or Pro)
-
- Group Availability – everyone on the team needs to be available
- Round Robin – Allow the person booking the meeting to choose the time that is best for them and align appropriately with a team member who is available at that time
-
- You can add additional fields to the booking form
- HubSpot branding will be removed from the Meetings tool
Note: HubSpot Sales Starter starts at $20/mo/seat, HubSpot Sales Professional starts at $100/mo/seat, and HubSpot Sales Enterprise starts at $150/mo/seat
Your Meetings Are Waiting for You
While we could tell you how useful the HubSpot Meetings Scheduler tool is, we recommend you try it for yourself. Still have questions or need some help? Let's talk. Contact us by clicking the button below.

How to Audit your Online Marketing
If you are executing digital marketing, congratulations! You are most likely already one step ahead of your competition, and making strides to meaningfully connect with prospects online. But, how do you know if you’re seeing continual success year over year, and improving your metrics?
Without the tools in place to analyze and benchmark your efforts, it is impossible to scale your online marketing and ensure continuous success.