It feels amazing to watch your company grow. However, there’s a reason the term “growing pains” exists (besides the '80s sitcom).
As business blooms, so does the number of sales and customer service employees, roles, and teams. This makes it harder to manage budget and data access for any B2B sales software you use. If you do it wrong, it can be downright financially irresponsible and even a security risk.
Are you considering buying HubSpot’s Sales or Service Hub? Or, looking to use your existing subscription more broadly or in-depth? To access certain features and remove limitations from other features, users will need a paid seat in your HubSpot portal.
Understanding how paid seats work – and how many you need – is your ticket to escaping HubSpot growing pains and operating at 100% efficiency.
What Does ‘Paid Seat’ Mean in HubSpot?
Owning a user account on your company’s portal does not necessarily make you a paid user. Not even if the company is paying $1,200/month for the fancy Enterprise tier.
As such, you’re probably asking: What’s the difference between paid and free access?
‘Free’ User Account 🥱
On HubSpot, a “user” is anyone with login privileges for the platform. These account holders can access a decent chunk of the sprawling feature and tool list:
- Content creation tools
- Automation tools
- Analytics
For a full list of what’s available for free-seat users …
- For Sales Hub: Click here, then click “How many paid users do I need?” in the tier feature boxes.
- For Service Hub: Click here, then click “How many paid users do I need?”
Of course, free seats aren’t truly free – you have to subscribe to a paid HubSpot tier to get them. But once you do, there’s no limit to the number you hand out – go full Oprah if you wish.
Paid Seat ✨
You can also assign paid seats to a limited number of users (more on that below) to give them full access to the Hub’s features.
Team members need to receive paid seat access before they become a paid user. Each paid user = one paid seat.
Paid seats apply in all non-free subscription tiers – Starter, Professional, and Enterprise. However, they don’t exist in all HubSpot platforms and features – just Service and Sales Hubs.
On the Sales Hub and Service Hub pricing pages, the person icon indicates that a feature is only available to paid seat users. For your convenience, here they are:
HubSpot Paid Seat Features
|
Sales Hub Paid Seat-Exclusives |
Service Hub Paid Seat-Exclusives |
|
Automatic lead-assigning rotation |
Automated ticket routing |
|
Overview of account deal progress |
Help desk automation |
|
Playbooks (resource library) |
Playbooks (resource library) |
|
Create forecasts |
Create forecasts |
|
Task calendar sync |
Task calendar sync |
|
E-signatures for quotes |
See when multiple agents are working on same ticket |
|
Automated sequences – emails, task reminders, etc. |
Automated sequences – emails, task reminders, etc. |
|
AI call insights |
AI call insights |
|
Split credit for deals |
Set & track goals for service activities |
|
Create service-level agreements |
|
|
Assign capacity limits for live-chat agents |
HubSpot Paid Seat Costs & Limits
HubSpot gives you a certain number of user licenses based on your subscription plan. If that number isn’t enough, you can add HubSpot seats on a per-user basis.
|
HubSpot Tier |
Default Users |
Extra Users |
|
Starter |
2 max. |
$9/user per month |
|
Professional |
5 max. |
$90/user per month |
|
Enterprise |
10 max. |
$120/user per month |
User limits and fees are identical for Sales Hub and Service Hub. Note that paying for a seat on one Hub doesn’t give you access to the other.
Do You Need Paid Seats in HubSpot? How Many?
A few factors to keep in mind as you evaluate seat investment:
- Investigate who uses a paid seat currently. This should include any group of people sharing a single account (which we don’t recommend) and whether they’re bumping into issues by not having their own account.
- Reference your software budget and match it against your candidates for paid seats. Look at the job role of each HubSpot user and which features you’d like them to use. Reserve paid seats for those who could make good use of the platform(s).
- Re-evaluate during your subscription renewal process. Each year, review how your teammates are using the software. There may be opportunities to take better advantage of certain features. Also, there may be teammates who have barely used the paid features over the past year – might as well remove or reassign the seat.
Before you rearrange seats, there’s one more variable to consider: the state of your entire subscription.
Upgrading to a higher HubSpot tier may be more valuable than adding seats. Moving up in tier is a big financial commitment, but it comes with more seats (eight if you jump from Starter to Enterprise). On top of that, you’re getting a ton of new features and loosened limits on old features. Compare HubSpot’s features per pricing plan and determine whether there’s value in moving up a tier vs. adding seats to your current one.

How to Manage Paid Seats in HubSpot
If you have Add and Edit Users and Modify Billing permissions in Sales or Service Hub, you can give other users access to paid features.
Assigning a Paid User to HubSpot
You can play musical chairs either during or after the creation of user accounts.
To grant paid-seat status while creating a new user, simply make a few clicks during the Permissions portion of the process.
- Click the tab of the Hub for which you want to provide a seat.
- Click to toggle the Access switch on.
- Click to toggle the Starter, Professional, or Enterprise switch on (depending on your subscription tier).
- If you’re out of seats, you’ll need to click Checkout at the end to purchase one.
For existing users, the process is equally easy.
- Click the ⚙️settings icon in HubSpot’s main navigation bar.
- In the left sidebar menu, click Users & Teams.
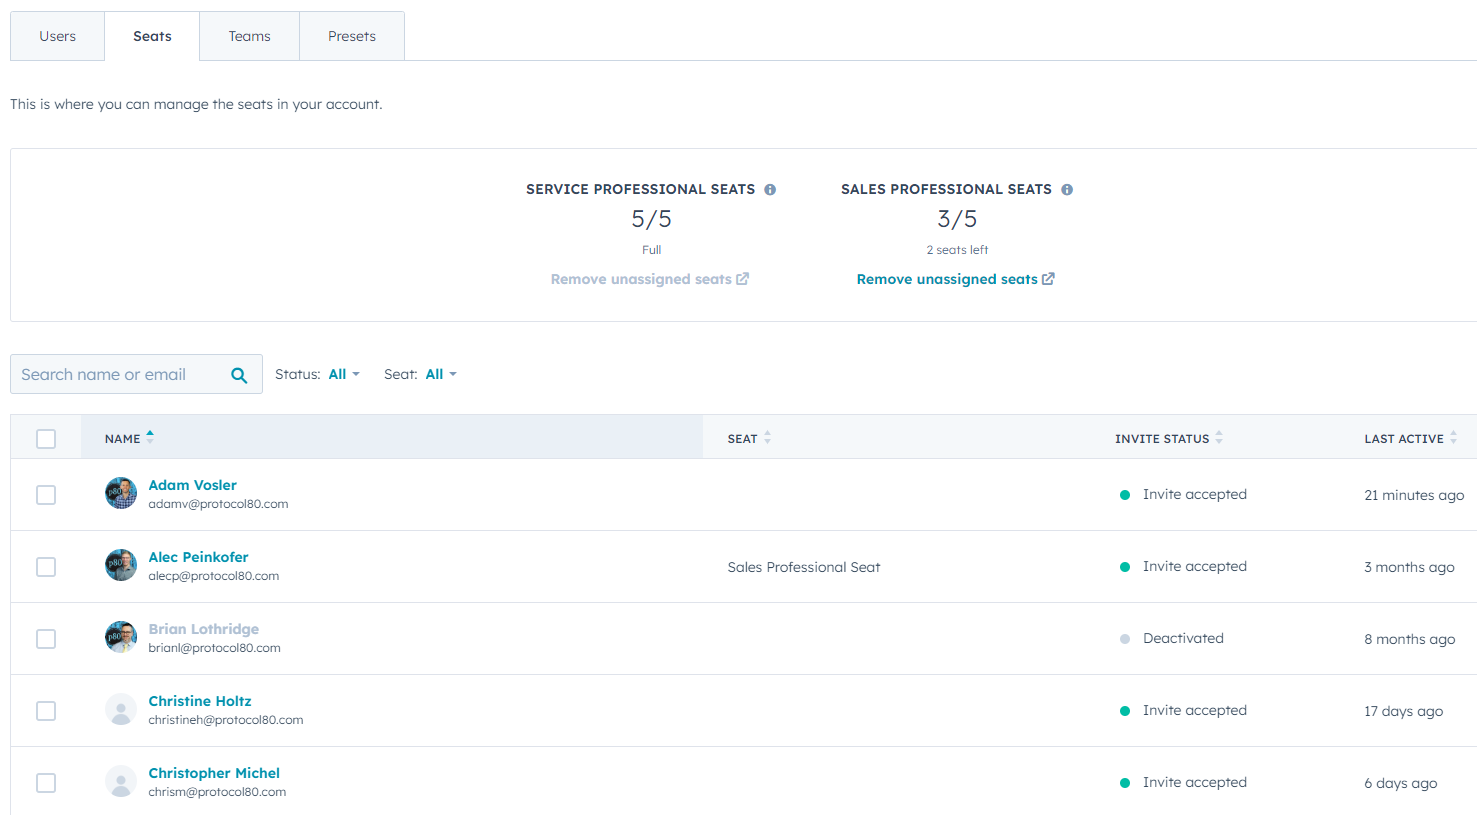
- Click the Seats tab near the top. For each Hub, it’ll show the number of filled seats vs. your limit.
- Find the user, hover over them, and click the Change User button.
- Click the Seat dropdown menu and choose a type, then hit Save.
- Or, if you’re out of seats, click Checkout to buy one.
Removing a Paid User/Seat From HubSpot
If you only want to unassign the seat, simply follow the directions above (#s 1-4) for existing users. Then, click the X in the box of any Hub seat you want to remove.
Removing a user with a paid seat, or unassigning a paid seat, opens a spot at the table back up. It does NOT mean you’re no longer paying for that seat. Think of it like Netflix: Uninstalling the app doesn’t keep the monthly bill from arriving in your email inbox.
If you’d rather permanently remove the seat:
- Unassign the seat (if you haven’t already) by following the steps listed above.
- Click the main navigation bar’s top-right area (where your company name is) and choose Account & Billing.
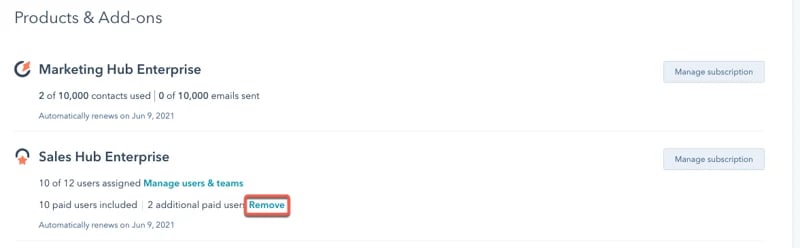
- In the Overview tab, view your subscription under Products & Add-ons. Click the Remove link next to the Hub from which you’d like to drop a seat.
- Use the number field in the dialog box to set a number of seats to cancel, then click the orange Remove button.
How to Use HubSpot to Its Fullest
HubSpot’s got amazing tools for sales, service, and more, but the tools are only as good as your process for using them. And your software budgeting is only as smart as each team member’s ability to squeeze value out of HubSpot.
If some or all of the team is new to B2B digital software, you may benefit from third-party onboarding services. Click below to learn about HubSpot consulting services:

How to Audit your Online Marketing
If you are executing digital marketing, congratulations! You are most likely already one step ahead of your competition, and making strides to meaningfully connect with prospects online. But, how do you know if you’re seeing continual success year over year, and improving your metrics?
Without the tools in place to analyze and benchmark your efforts, it is impossible to scale your online marketing and ensure continuous success.